What you waitin' for?

What you waitin' for?

Create your slideshow now!

A Super Lightweight Slider

A Super Lightweight Slider

100% WordPress and Bootstrap

Visualize Your Ideas.

Visualize Your Ideas.

And customize everything.

Green Leaves and Jam, a Plant-Based Diet

Supporting you and your plant-based diet

Healthy Double Chocolaty Chip Frappe (Caffeine Free)

Healthy Double Chocolaty Chip Frappe (Non-Caffeinated)

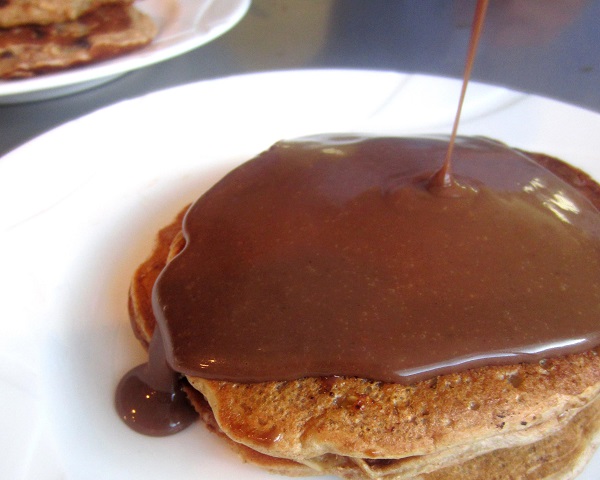
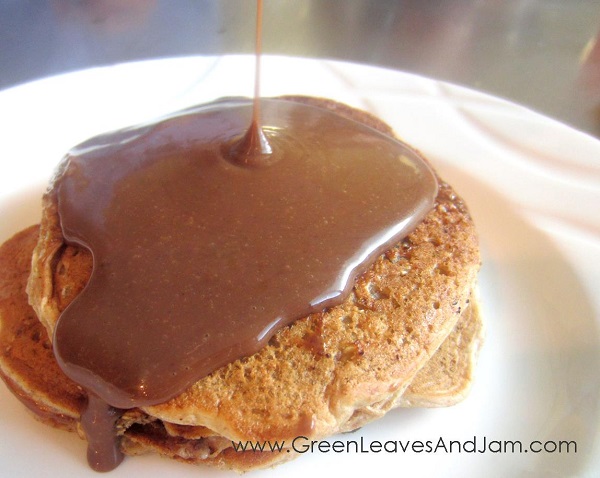
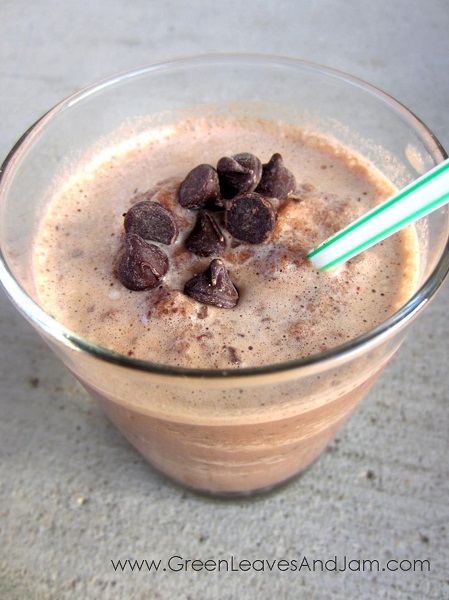
I grew up loving Starbuck’s Double Chocolaty Chip Frappuccino (which by the way is one of the few items on Starbuck’s menu that is caffeine-free). This was something that I have built into myself to crave every time I walk into an airport. I got them a lot, but for some reason, every time I went on a flight I would pick one of these up as a little treat for myself. To be honest, I think it’s been over a year since I had one.. to be honest I can’t even remember the last time I had one (it’s probably better that way..).

I saw this recipe online for these “Healthy Wendy’s Frosty’s”. (Here is the link for the pin: http://pinterest.com/pin/136937644892797928/. I can’t seem to find the actual creator of the recipe though..)Maybe you’ve seen that circling around Pinterest as well. When I made it I was a little disappointed because besides the fact that it was cold and chocolaty, I didn’t feel it was much like a Wendy’s Frosty. I then started to experiment and realized that with a few small tweaks, it was a great substitute for my favorite little Starbucks Frappe, the Double Chocolaty Chip Frappuccino.

Healthy Double Chocolaty Chip Frappe (non-caffeinated)

I haven’t actually tried it with vegan whip cream and chocolate sauce because I wanted to keep it healthy, but maybe if I’m feeling really indulgent one day I might give it a try.

One thing that I love about this for a dessert is that after I drink it down there is no guilt. I feel that I got a large dessert and feel totally satisfied, but I don’t feel like I’m going to weigh 5 lbs more the next day. I love that it’s mostly healthy ingredients. Non-dairy milk and ice, a banana, and cocoa. Then just a touch of unhealthy-ness: a little agave and chocolate chips. See what I mean?! No guilt!:)

Healthy Double Chocolaty Chip Frappe (Non-caffeinated)

5.0 from 1 reviews
Healthy Double Chocolaty Chip Frappe
 
Print
Prep time
5 mins
Total time
5 mins
 
Makes 2 large cups or 3 small ones.
Author: greenleavesandjam.com
Serves: 2-3
Ingredients
  • 1½ cups non-dairy milk (I use unsweetened soy milk)
  • 30 ice cubes
  • 1 tsp vanilla
  • 4 tbsp cocoa
  • 1 medium banana*
  • 2 tbsp agave, maple syrup or honey
  • 3-4 tbsp chocolate chips
Directions
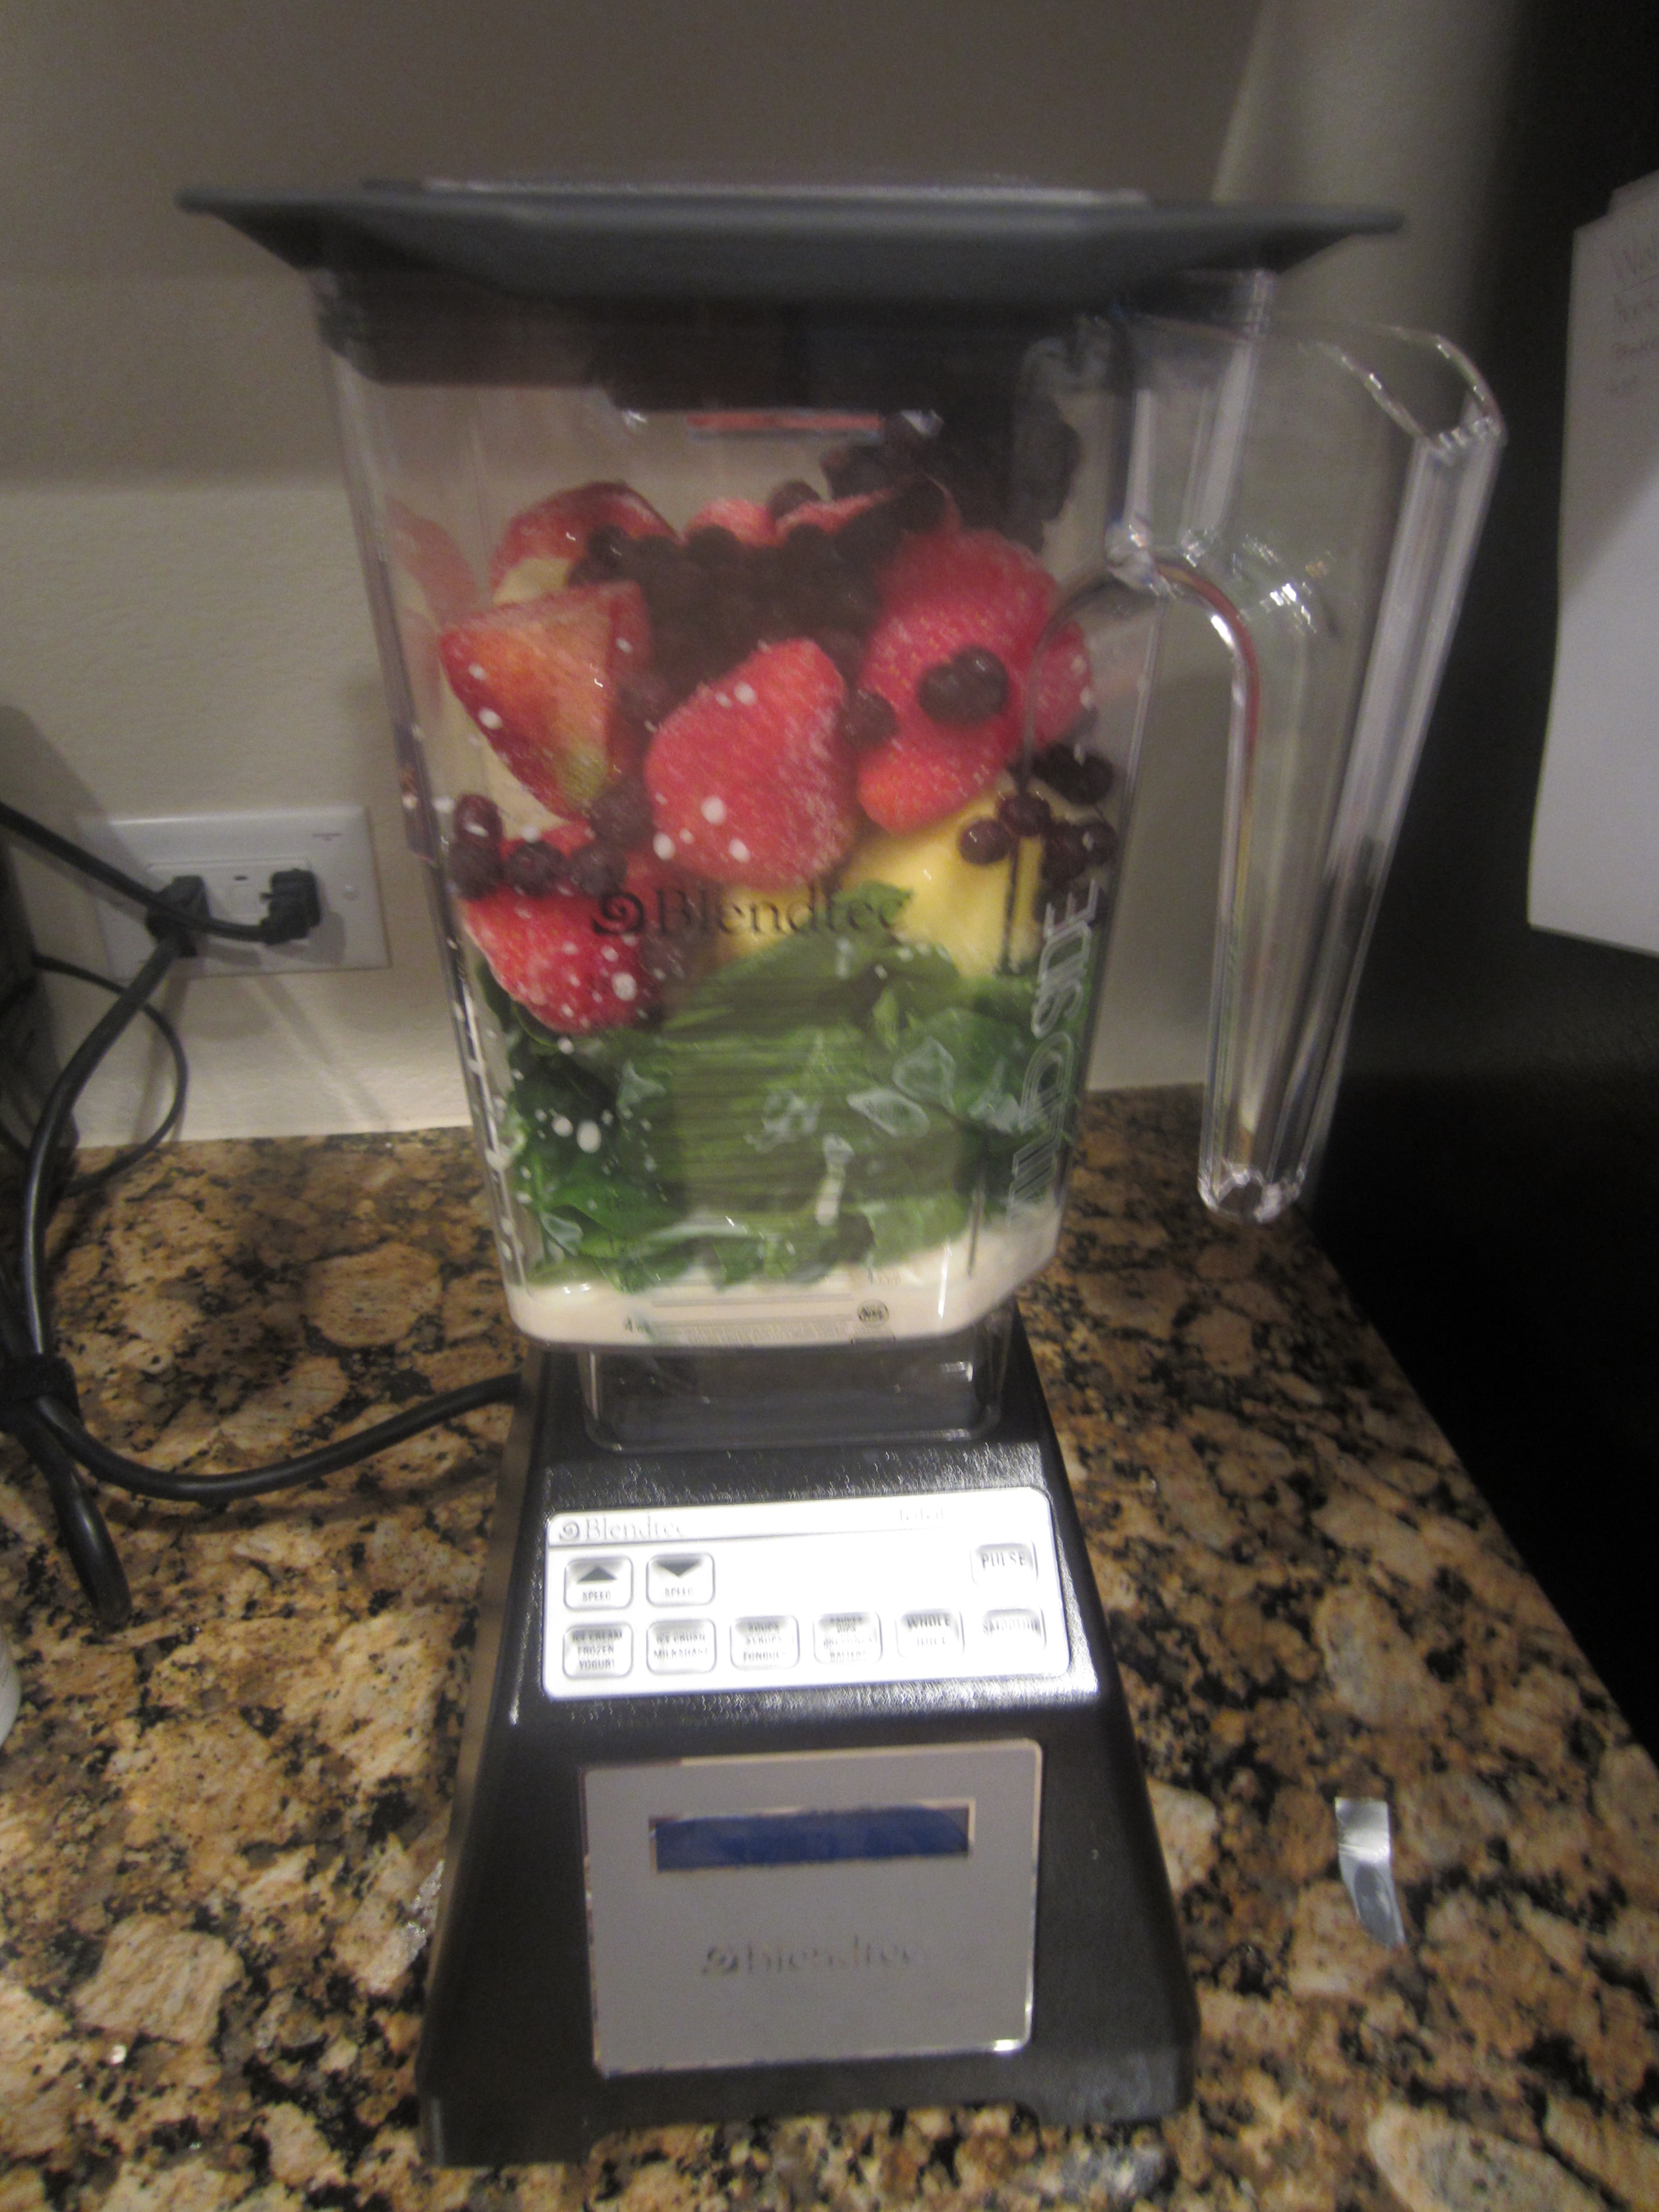
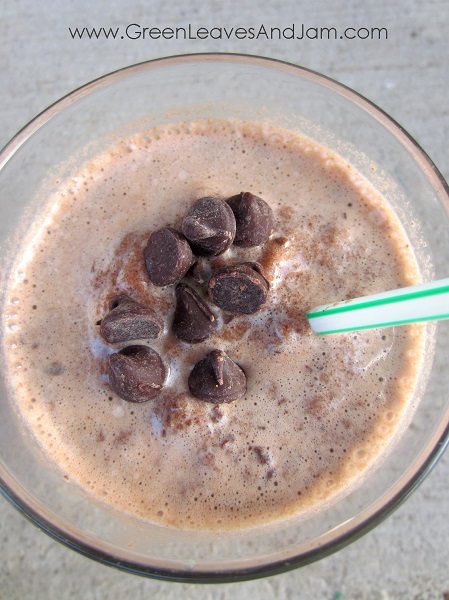
  1. In the blender add in your milk, ice cubes, vanilla, cocoa, banana and agave. Blend until there aren't any large chunks of ice cubes. Remember, you're trying to mimic the consistency of Starbucks' Double Chocolaty Chip Frappuccino, so leave it icy and don't over blend it into just a liquid.
  2. Add in your chocolate chips and blend again just long enough for them to break up into little chunks (again, just like Starbucks' frappucino).
*You want your banana to be ripe, but try to not let it be too over ripe. The more ripe it is, the stronger the banana flavor will be in your drink.
3.2.1682

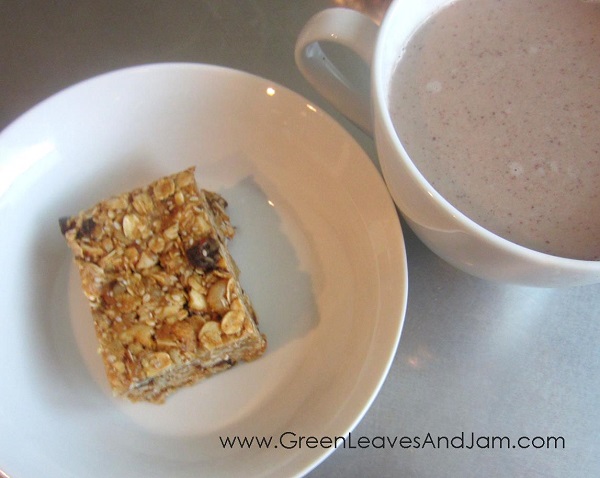
Hope you enjoy this as much as we do!

Kristin

Posted in Healthy Desserts, Recipes Tagged Healthy Desserts, plant based, vegan recipes 2 Comments

Healthy Chocolate Peanut Butter Syrup/Sauce

Healthy Chocolate Peanut Butter Sauce

The morning that we celebrated my daughter’s birthday I made pancakes and our usual peanut butter syrup to go with them. While making them I had an epiphany. Add cocoa! It doesn’t decrease the healthiness of the sauce, it just adds an extra element of YUM! I bet you can guess what my daughter (and husband’s) reactions were? They were scarfing them. Go figure.

The original recipe that I have for the Healthy Peanut Butter Syrup only calls for 1-3 tablespoons of agave but in this I put 2-4 depending on if my peanut butter had sugar in it or not. I’m sure you won’t mind taste-testing this sauce to see if it needs more agave.:)

Healthy Chocolate Peanut Butter Sauce

Healthy Chocolate Peanut Butter Syrup/Sauce
 
Print
Prep time
2 mins
Cook time
5 mins
Total time
7 mins
 
Author: greenleavesandjam.com
Ingredients
  • 1½ cup non-dairy milk (I used unsweetened soy milk), split up
  • ¼ cup cocoa
  • ½ cup peanut butter
  • 2-4 tbsp agave, maple syrup or honey
  • 1 tsp vanilla
Directions
  1. In a small bowl, whisk together ½ cup milk with the cocoa. stir this well until it is smooth.
  2. Place the remaining 1 cup of soy milk in a sauce pan and add in your milk/cocoa mixture. Add the peanut butter and agave as well.
  3. Heat over medium-high heat, stiring often, until the edges begin to boil. Remove from heat and add the vanilla. Let the sauce cool to a comfortable eating temperature.
  4. *If you would like the sauce to be a little thicker, simply boil a little longer until it reaches your desired consistency. Remember that the sauce will thicken some as it cools.
3.2.1682

I used this chocolate peanut butter sauce for topping our pancakes, but it would also be excellent on top of ice cream, as a dip for fruit, and anything else your heart desires. If you come up with any brilliant ways you like to use this sauce, please share your idea with us!

Thanks,

Kristin

Posted in Breakfast, Dips, Healthy Desserts, Recipes Tagged breakfast, Healthy Desserts, plant based, vegan recipes Leave a comment

Crowd-pleasing Vegan Lasagna

crowd-pleasing vegan lasagna www.greenleavesandjam.com
We’ve had lots of company lately and this is my all-time favorite lasagna to feed to a crowd.  And it doesn’t matter if it is a plant-loving or meat-loving crowd, everyone loves this lasagna with spinach and zucchini.  My teenage son even says it is his favorite lasagna ever and he isn’t converted to vegan eating.
crowd-pleasing vegan lasagna www.greenleavesandjam.com

I don’t precook my lasagna noodles and I use jarred pasta sauce to keep this easy to make.

The tofu-spinach ‘cheese’ layer is best blended in a food processor.  I’ve used a blender before but I found that I prefer to use the food processor since the mixture can be difficult to blend well and scrape out of a blender.

crowd-pleasing vegan lasagna www.greenleavesandjam.com
Here I served it with a salad and watermelon.  I don’t know if I would normally think to serve watermelon with lasagna, but it’s summer and I had watermelon calling my name, so that’s what we had!

Crowd-pleasing Vegan Lasagna
 
Print
Prep time
15 mins
Cook time
60 mins
Total time
1 hour 15 mins
 
Adapted from 'my favorite lasagna' at fatfreevegan.com
Author: greenleavesandjam.com
Serves: 8-10
Ingredients
  • 56 oz spaghetti/pasta sauce
  • 2 tsp garlic, chopped
  • ½ lb fresh, sliced mushrooms
  • 2 zucchini, chopped
  • vegetable broth for sautéing
  • 10 oz frozen chopped spinach
  • 1 lb firm tofu
  • 1 tsp salt
  • 2 tbsp. nutritional yeast
  • 1 tbsp oregano
  • 1 tsp garlic powder
  • 1 tsp basil
  • ½ tsp crushed rosemary
  • ⅛ tsp cayenne pepper
  • 1 pkg lasagna noodles
  • 1 can sliced black olives
  • ½ lb of shredded vegetable 'mozzarella'
Directions
  1. Preheat oven to 375 degrees.
  2. Saute garlic in 2 tablespoons of vegetable broth over medium heat. Add sliced mushrooms and chopped zucchini and cook until tender. Add the spaghetti sauce, remove from heat and set aside.
  3. Process tofu, thawed and drained spinach in food processor until smooth. Add salt, nutritional yeast, oregano, garlic powder, basil, rosemary, and cayenne pepper and process until well mixed.
  4. Spread half of the vegetable/pasta sauce mixture in the bottom of a large casserole pan. Layer lasagna noodles on top. Spread half of the tofu mixture on top of noodles. Add another layer of lasagna noodles. Spread the rest of the tofu mixture on top of noodles. Add a final layer of noodles and top with remain sauce.
  5. Cover with foil and bake for 30 minutes. Remove foil and bake for an additional 30 minutes. In the last 10 minutes of baking add the sliced black olives and shredded 'mozzarella'.
3.2.1682

I’ve tried lots of different vegan lasagnas and this is by far my favorite!

Enjoy!  Julie

Posted in Dinner, Recipes Tagged casserole, main dish, plant based, vegan recipes 1 Comment

Choosing a Blender

Here is my own personal reviews of the 3 different blenders that I either have owned or have worked quite a bit with:

About a week before Mother’s day this last May, our blender that we have used for about 3 years finally gave out on us. We loved our blender so we were really sad to see it go, but we had been wanting to upgrade to a professional grade blender for some time, and figured we would capitalize on this opportunity. For my mother’s day and my husband’s father’s day gift, we did a joint present of a blender.

Blendtec

KitchenAid: I figured that I should share a little about our old KitchenAid blender first. We got a KitchenAid blender for our wedding and used it almost daily until it finally gave out. This blender was perfect and works great for the casual blender user. It’s about half the price of the higher-grade blenders, and performs almost as well. If you research a little into blenders, this one usually shows up at the top of the list for the cheaper options of blenders. In some ways it even out-performed the Blendtec and the Vitamix, that being said, it doesn’t have as big of a motor as the professional grade ones, but it does a great job. I would totally recommend this blender to someone who doesn’t blend every single day, or for someone who has a smaller budget.

Blendtec: When we were deciding about which blender we wanted to replace our KitchenAid blender with, we knew it was between either a Blendtec or a Vitamix. We researched for probably hours (the usual for us when we make bigger purchases) and finally came to the conclusion that the Blendtec was what was going to fit our current needs. It is high powered and pulverizes just about everything. Our smoothies in the morning are more of a liquid than a smoothie, and I really like that because it means I’m able to drink it down a lot faster. The other nice thing about it is that the blades aren’t sharp! Every time I cleaned the KitchenAid blender I was so nervous and extra cautious about the blades because I didn’t want to cut myself. It’s so nice to know that I don’t even have to think about that with our new Blendtec. We were looking into buying either the Blendtec or the Vitamix with the variable speeds because that was important to us. That being said, the blendtec was the cheaper option between those two.

The Blendtec has pre-set settings that just with a push of a button you’re able to make a smoothie, soup, dressing, etc. At first I was afraid that this would make me frustrated that I was only able to push those certain buttons, but I actually like the setting now. I know that when I make my smoothies I push the “smoothie” button 2 times for our favorite texture of smoothie(liquidy). You’re also able to use the “pulse” button if you choose to not go with a specific setting.

One more thought: we chose to buy the blender with the second pitcher (the wildside blender). I love to home-make everything and I knew that each of the pitchers had their own specific purposes, so this was what we chose to do. Research the different things each pitcher does and decide if a second pitcher is really worth the price for you.

Vitamix: Now to talk about the Vitamix. I love the Vitamix.  My parents have a Vitamix and every time we go into town I get to use it for our smoothies, making soups..etc. To be honest I don’t notice a whole lot of difference between the two besides one factor: the “tamper tool,” or as we call it, the”plunger!” That is the only major difference in my eyes between the Blendtec and the Vitamix. There have been a few times when I’ve been blending smoothies that I put in a few too many frozen things and then have to go through the hassle of turning it off, shaking it down, and re-starting. When this happens, I usually mention the wonderful plunger that comes with the Vitamix and wish we had one for our Blendtec.

The Vitamix that I linked to this page is the one with the variable speed option. This was the one we were thinking about buying when we were deciding between the Vitamix and the Blendtec. That is the one that my parents have, and I felt that it gave me more control over the speed that I used and I really liked that. You can also purchase a cheaper version that they make that is a two speed blender.

You can also purchase a Vitamix with a second pitcher for different uses. My mom has one for “dry ingredients” and one for “wet ingredients.” Again, you can look into the second pitcher and decide if that is worth it for you and your family.

Blendtec

Choosing a blender can be hard. They all have their pros and cons and you just have to choose the blender that best suits your specific wants and needs. Good Luck! Happy Shopping!

Kristin

Posted in Kitchen Tools, Misc, Plant-based Life and Parenting Tagged kitchen tools, plant-based life and parenting, shopping on a budget 2 Comments

Chipotle Black Bean Burgers


Chipotle Black Bean Burgers. GreenLeavesAndJam.com We had the missionaries from our church over last night for dinner. We love having the missionaries over because it’s always fun to see their reactions to the food that we make. Last night was especially fun though because one of them was surprisingly interested in the way we eat. Not only that but he started requesting recipes from me! Very different from the normal reactions we get.  He also stated over and over how much he LOVED these chipotle black bean burgers and made me promise to bring the recipe for him to church this Sunday. That made my day. One more thing: He also stated at the end of the evening, after having some of our dessert as well, that he thinks our house might be his favorite one he’s eaten at so far (they usually eat at a family’s house from our church pretty much every night). Great compliment.:)

Chipotle Black Bean Burgers. GreenLeavesAndJam.com

That being said, we LOVE bean burgers! These ones are especially tasty because they are filled with great flavorful veggies and beans and have some chipotle powder in them that gives them a nice kick! Here is the lovely recipe:

Chipotle Black Bean Burgers
 
Print
Prep time
20 mins
Cook time
30 mins
Total time
50 mins
 
Makes 10-12 burgers
Author: greenleavesandjam.com
Ingredients
  • ½ cup vegetable broth
  • 1 large onion, chopped
  • 1 red bell pepper, seeded & chopped
  • 1 green bell pepper, seeded & chopped
  • 4 cloves garlic, minced
  • 2 tbsp tomato paste
  • 1½ tbsp dijon mustard
  • 2 tsp cumin
  • ½ tsp sea salt
  • 1 tsp chipotle powder
  • 1½ cups frozen corn, prepared in microwave according to package directions
  • 1 can black beans, drained and rinsed
  • 1½ cups plain breadcrumbs
Directions
  1. Preheat oven to 450 degrees.
  2. Chop the onion and both peppers and place in a saucepan with the vegetable broth. Cook over medium-high heat for about 7 minutes or until they are looking tender. Watch the vegetable broth and add more as needed. Don't let your veggies burn to the pan! Add the garlic, tomato paste, mustard, cumin, sea salt and chipotle powder and stir.
  3. Remove the pan from the heat and let sit for a bit to cool.
  4. Microwave the corn then set it aside.
  5. Drain and rinse the black beans. Add the black beans, along with the cooked veggie/spices mixture to your food processor. Pulse it until they are pretty well combined, but still have some chunks left. Add in the cooked corn and pulse for another 7 seconds or until they are incorporated throughout the mixture.
  6. Remove this mixture from the food processor and place it into a medium size bowl. Add in the breadcrumbs and mix well. When you are adding the breadcrumbs, add the last ½ cup slowly. I like my bean burgers to be a little more dry than some might, so add that last ½ cup slowly and watch it to see if you would prefer to have less and have them be a little more wet.
  7. Lightly grease a baking sheet and spoon some of the mixture(the amount you want for each burger) onto the pan, then using a spoon, shape the burgers into patty-shape. Place in your oven for 15 minutes at 450 degrees. Remove them from the oven and flip the burger patties to let them cook on the other side. Cook in the oven for another 15 minutes (totaling 30 minutes in cook-time). Remove, let cool, enjoy with your favorite burger toppings!
3.2.1682

Chipotle Black Bean Burgers. GreenLeavesAndJam.com

Give these chipotle black bean burgers a try then come back and let us know what you think! Can’t wait to hear back from you!

Kristin

Posted in Dinner, Holidays, July 4th, Recipes Tagged 4th of July, beans, main dish, plant based, vegan recipes Leave a comment

Nutty for Granola Bars

Nutty For Granola Bars. GreenLeavesAndJam.com

I love rainy days. Today it is gray outside and there has been a fair amount of rain. S (my daughter) and I went on a walk earlier and got caught out in it. When we got back home, I sat in the garage and read a book while she played in the rain. It was so perfect!

IMG_7402

IMG_7403

IMG_7404

She’s got such a cheesy smile. What a goof!

We then came inside to have some lunch. Lunch today was a bit of a “splurge,” if you will. We had one of these awesome nutty granola bars, hot chocolate, and some apple sauce. Could it get any better?

Nutty for Granola Bars. GreenLeavesAndJam.com

My family and I really like granola bars. Before changing our diet for the better, the hubby and I used to pack a cheapo chocolate chip granola bar for our lunches every day.  Not only were these unhealthy, full of corn syrup and lots of sugar and probably more processed grains than we should have been eating, but they weren’t really very filling either. Now, if we are going to eat granola bars, I like to make them from scratch, this way I know EXACTLY what is in them. These are also very filling!

Nutty for Granola Bars. GreenLeavesAndJam.com

They are chewy but they also have a really great large crunch and small crunch to them. Let me explain that comment. The large crunch is from the many different nuts in the granola bars, while the small crunch is from the little seeds such as the sesame seeds, chia seeds, sunflower seeds and the walnuts. I really love chewing each bite with all the different textures it has.

They are pretty easy to make as well. I just blended a few of the nuts in my food processor to break them down a bit, then mixed them in with the other ingredients. I then threw all of it into an 8×8 pan that I lined with some tinfoil and let that sit in my freezer for about an hour. Once it had firmed up, I pulled the pan out of the freezer and removed the granola using the tinfoil and cut them into bars. Afterwards, I placed them back in the pan and then put them into the refrigerator to store. Pretty simple ey?

Nutty for Granola Bars. GreenLeavesAndJam.com

Nutty for Granola Bars. GreenLeavesAndJam.com

Nutty for Granola Bars
 
Print
Prep time
10 mins
Total time
10 mins
 
Author: greenleavesandjam.com
Serves: 12
Ingredients
  • ½ cup almonds
  • ¾ cup cashews
  • ½ cup walnuts
  • 1½ cup oats (not instant)
  • ¼ cup sunflower seeds
  • ¼ cup sesame seeds
  • 2 tbsp chia seeds
  • ½ cup flax meal
  • ½ cup chocolate chips or raisins
  • 1 /2 cup agave, or sticky sweetener of choice
  • 1 cup natural peanut butter, or other nut butter of choice
Directions
  1. If your almonds, cashews and walnuts are whole, use a food processor to grind them up a bit so they are smaller pieces. For the almonds I blended them for 10 seconds. For the cashews, 5 seconds(mine were in halves) and my walnuts were already in small enough pieces that it wasn't necessary to grind them. I also chose to grind my chocolate chips for about 7 seconds so that I would have smaller pieces.
  2. Place all the nuts,oats, seeds and flaxmeal into a bowl and stir. Add your chocolate chips and stir. Add in the agave and mix again. Add in the peanut butter and mix one last time. Make sure that everything is evenly coated. Line an 8x8 baking dish (a 7x11 baking dish works too) with tinfoil or parchment paper (with the edges hanging over so you can remove it from the pan later) and place the granola ingredients into it. Press it all down firmly and evenly. Cover the pan and place it in your freezer for an hour to let it firm up, or in a refrigerator overnight. If you choose to do it in the freezer, remove it from the freezer once it is firm and store it in the refrigerator. Remove from the pan using the tinfoil/freezer paper and cut into squares.
3.2.1682

This recipe was slightly adapted from vegan-heartland.com’s Chocolate Peanut Butter Breakfast Bars.

Nutty for Granola Bars. GreenLeavesAndJam.com

As one last side note: Last week we got to go visit my parents and siblings in Kentucky! It was so fun seeing everyone. Somehow we didn’t get very many pictures though. Here is one from when we went to the zoo with my parents:

IMG_7365

Anyway, like I mentioned before, we love granola bars, and these ones are really a home run for my family. Hope they are for you too!

Kristin

Posted in Breakfast, Healthy Desserts, Misc, Recipes Tagged breakfast, Healthy Desserts, plant based, vegan recipes 4 Comments

Healthy Sauteed Vegetables

sauteed summer squash The 4th of July has come and gone. I think we really should call it Independence Day as that more accurately describes why we celebrate the 4th. Sadly sometimes I fear we don’t spend enough time recognizing the true meaning of important holidays. In church yesterday we stood and sang the Star-spangled Banner and I had the fun of playing the organ for the congregation.  Frankly, I’m not really an organist.  I’m a pianist that has learned how to ‘fake’ the organ.  I don’t know if it will ever be really comfortable, but on a couple of occasions over the past few years, I’ve had the opportunity to play the organ for the Star-spangled Banner which is really fun.  I love the national anthem.

We had the whole family here, all four grown kids, one son-in-law (one couldn’t be here), three grandchildren and even my mother, for our 4th of July celebration.  It was the first time we’ve all been together in almost three years.  The last time we were all together, we only had one grandbaby so it was fun to have all the grandkids here.  By the end of the year we will have five grandchildren!  We were only together for a couple of days, then everyone had to start heading back home to Tennessee, Texas and Idaho.

summer fiesta salad vegan meal www.greenleavesandjam.com

Did you notice the sautéed yellow summer squash in this Fiesta Summer Salad meal?  Or the squash and mushrooms I added to my Veggie Spaghetti?  Healthy sautéed vegetables are easy, yummy, and of course, good for you.

squash and mushrooms

When you hear sautéed you may think of the common definition of sauté which is to cook lightly in a pan with a little butter or oil.  But it is just as quick and easy to sauté vegetables without the fats.

Simply substitute water or vegetable broth for the butter.  I prefer to use vegetable broth.  I think it’s more flavorful.  Some vegetables, like the summer squash, release liquid as they cook, but many others do not, like the mushrooms.  When you sauté with oil you may find that you only use a tablespoon or a little more, but when sautéing with water or vegetable broth, you’ll want to keep extra on hand to add as you cook as the broth tends to simmer away. sauteed summer squash

Because the broth and water simmer away and dry out the pan quickly, I like to cook my vegetables on low to medium heat and use a lid to cover the pan in between stirring.  The lid keeps the heat in for quicker cooking and prevents the liquids from evaporating quite so quickly.

I love yellow summer squash!  I cook it often.  When one of my sons was young he would ask everyday what we were having for dinner and he would cheer “Yay, no squash” on the days that I wasn’t serving squash.  Happily, as an adult, he’s a little more agreeable to his vegetables today.

Healthy Sauteed Summer Squash
 
Print
Prep time
10 mins
Cook time
10 mins
Total time
20 mins
 
Author: greenleavesandjam.com
Serves: 4
Ingredients
  • 5 summer squash
  • 1 large onion
  • vegetable broth
  • salt and pepper to taste
Directions
  1. Chop the squash and onion.
  2. Add chopped vegetables and ½ of broth to a non-stick pan.
  3. Cook over medium heat stirring often. Cover with a lid in between stirring to prevent lose of liquid.
  4. Heat until cooked through adding broth as needed.
3.2.1682

What vegetables do you have ready to be sautéed?  Enjoy eating no-oil, good-for-you sautéed vegetables today.

Julie

Posted in Recipes, Sides Tagged quick and easy, side dish, vegan recipes, vegetables Leave a comment

July 4th Menu, Plant-based/Vegan

I just thought I would share our July 4th menu/activities with you to help you get started on yours.

As a side note, all the pictures are linked to their original poster/photographer. To check out their blog, or read more into them, click on the pictures.

For breakfast

  • I will be making this 4th of July Toast from BeDifferentActNormal.com

4th of July Toast


For our late afternoon lunch/ early dinner (Linner? Dunch?)

  • Fruit Skewers
  • A Salad of some sort
  • A healthier chip such as these “Food Should Taste Good Multigrain chips”

multigrain

  • Our Guacamole:

Simple Guacamole2

  • Our Carrot Hot Dogs:

carrot hot dog

  • We will probably just buy some pre-made bean burgers from Costco and then grill those up. Regrettably, I haven’t posted our favorite bean burger yet, but here is one that you can make with left-over soup if you have some:

Burgers from left-over soup (5) - Copy


For Dessert:

  • Because my husband LOVES Cookie Ice cream Sundaes I will be making these cookies:

Vegan Chocolate Chip Cookies

  • I am debating between my favorite Peach Cobbler (which I have yet to post), or our Apple Berry Crumble (If I end up making the peach cobbler I will be posting that just a few days after I make it) :

Apple Berry Crumble

  • Homemade Vegan Ice Cream that I have yet to post as well..


Here is the activity from NoTimeForFlashcards.com that I am thinking about doing with my daughter, my niece and my nephew that we will be with:

flag-day-gross-motor-activity-for-kids

There are the things that I am planning to make for this July 4th Holiday! I am so excited and can’t wait to share these recipes with my family and especially with my non-vegan/non-plant-based family! Can’t wait to see what they think about it all!

Here are a few extra options that you could consider for your July 4th menu:

  • Lentil Meatball subs:

Lentil Meatball Sub1

  • Quinoa Tacos:

Quinoa tacos


I love to cook and bake, but another hobby of mine is sewing. I love to sew! Here is the fun little shirt that I made for my daughter to wear for the 4th of July.

1010661_10200175726984944_1495618540_n

My mom and sister made the cute bow that matches it. She didn’t have enough hair last year to hold the bow in, so I’m super excited that she can wear it this year! We’ve only been waiting an entire year!

I hope your 4th of July is filled with family, good food, and love for your country!

Kristin

Related Posts Plugin for WordPress, Blogger...
Posted in Holidays, July 4th Tagged 4th of July, meal planning 2 Comments
  • « Older Entries
  • 1
  • 2
  • 3
  • …
  • 17
  • Newer Entries »

WordPress Theme Custom Community 2 developed by Macho Themes